
How to Sublimate on Mugs and Drinkware: Step-by-Step Guide

Sublimating mugs and drinkware is a popular way to create colorful, personalized products for gifts, events, promotions, and resale. With the correct sublimation-ready blank, equipment, transfer paper, ink, and heat settings, you can produce vibrant designs with sharp details and durable results.
In this guide, you’ll learn how to sublimate a mug step by step, what equipment you need, what sublimation mugs are, and how to avoid common problems such as ghosting, fading, uneven color, and incorrect transfers.
Looking for supplies? Browse our Sublimation Mugs and Drinkware and White Sublimation Mugs to get started.
What Are Sublimation Mugs?
Sublimation mugs are specially coated mugs designed to accept dye-sublimation ink when heat and pressure are applied. Unlike ordinary ceramic mugs, sublimation-ready mugs have a coating that allows the printed design to bond with the surface during the heating process.
This produces a smooth, full-color image that becomes part of the coated surface rather than sitting on top of it.
For the best results, always use a mug or drinkware blank that is specifically identified as sublimation-ready.
What You’ll Need to Sublimate Mugs and Drinkware
Before beginning, gather the appropriate supplies:
Sublimation printer with dye-sublimation ink
Sublimation transfer paper
Heat-resistant tape
Lint roller or clean lint-free cloth
Protective paper, such as butcher paper or clean copy paper
Heat-resistant gloves
Mug press or dedicated convection oven
Shrink-wrap sleeves or silicone wraps when required
Sublimation-ready mug or drinkware blank
Heat-safe cooling surface
Always verify that the product is designed for sublimation. Standard drinkware without a compatible sublimation coating will not produce the same results.
How to Sublimate a Mug: Step-by-Step
Step 1: Choose the Right Sublimation Mug
Start with a sublimation-ready mug that has a coating designed to accept dye-sublimation ink.
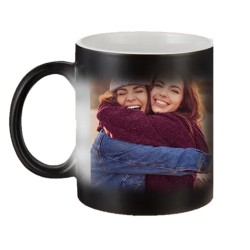
Classic 11-ounce and 15-ounce white sublimation mugs are popular choices for personalized gifts, business logos, promotional products, photographs, and special-event designs.
Choose the size and style that works best for your project and confirm that it is compatible with your mug press or heating method.
Browse our White Sublimation Mugs to find compatible mug blanks for your projects.
Step 2: Prepare Your Artwork
Create your design based on the printable area of the mug.
The exact artwork dimensions can vary depending on the mug size, shape, and equipment being used.
Before printing:
Size the artwork correctly
Mirror the image
Check spelling and placement
Leave enough room around the mug handle
Extend backgrounds slightly when creating a full-wrap design
Print a test copy on regular paper when necessary
A test print can help confirm placement and sizing before you use sublimation paper and ink.
Step 3: Print the Sublimation Transfer
Print the mirrored artwork onto sublimation transfer paper using your sublimation printer.
Use the printer settings and color-management profile recommended for your printer, ink, transfer paper, and design software.
Correct printer settings can help improve color accuracy and reduce problems such as banding, faded colors, or excessive ink.
Allow the printed transfer to dry before handling it.
Step 4: Clean and Prepare the Mug
Make sure the mug is clean, dry, and free from dust, lint, fingerprints, or debris.
Use a lint roller or clean lint-free cloth to clean the printable surface.
Even small particles trapped between the transfer and the mug can create unwanted marks or imperfections during pressing.
Avoid touching the cleaned printing area with your fingers.
Step 5: Position and Tape the Transfer
Place the printed side of the transfer directly against the coated surface of the mug.
Wrap the paper tightly and evenly around the mug and secure it with heat-resistant tape.
Before pressing, confirm that:
The design is straight
The transfer paper is tight against the mug
There are no wrinkles
The transfer is positioned correctly around the handle
The paper cannot shift
Heat-resistant tape is not covering important areas of the artwork
A securely positioned transfer helps reduce ghosting, blurry edges, and uneven results.
Step 6: Press the Mug
Preheat your mug press and use the time, temperature, and pressure settings recommended for the specific mug blank and press model.
Sublimation settings can vary depending on:
Mug coating
Mug size
Press model
Heating-element condition
Room temperature
Transfer paper
Sublimation ink system
Review our Sublimation Time and Temperature Guide for useful starting information.
Always follow the instructions for the exact mug or drinkware blank you are using. When working with a new product or new equipment, perform a test press before beginning a large production run.
Do not assume that one time-and-temperature setting will work for every sublimation mug.
Step 7: Remove the Transfer and Cool the Mug
When the pressing cycle is complete, carefully remove the mug while wearing heat-resistant gloves.
Remove the transfer paper carefully and place the mug on a heat-safe surface.
Allow it to cool naturally.
Do not place a very hot ceramic or glass mug directly into cold water. Sudden temperature changes may damage or crack the drinkware.
Once the mug has cooled, inspect the finished result for:
Vibrant, even color
Sharp text and design details
Complete transfer coverage
Correct artwork placement
Faded or overheated areas
Ghosting or blurry edges
Allow the mug to cool completely before packaging or handling it extensively.
How to Sublimate Tumblers and Other Drinkware
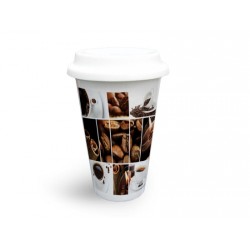
The basic sublimation process is similar for many drinkware products, but tumblers, sports bottles, travel mugs, shot glasses, beer mugs, and other specialty items may require different equipment or heating methods.
Depending on the product, you may need:
A tumbler press
A mug press with a compatible heating element
A silicone wrap
A shrink-wrap sleeve
A dedicated convection oven
When using a convection oven for sublimation, use an oven dedicated only to sublimation production. Do not use the same oven for preparing food.
Wrap the transfer securely around the drinkware and follow the time, temperature, pressure, and cooling instructions recommended for that specific blank.
For more detailed information, read How to Sublimate Tumblers: Full Wrap vs. Partial Wrap Methods or compare Mug Press vs. Convection Oven: Which Is Better for Sublimating Drinkware?.
You can also browse our complete Sublimation Mugs and Drinkware collection.
Common Mug Sublimation Problems and How to Fix Them
Faded Colors
Faded results may be caused by insufficient pressing time, low temperature, incorrect pressure, printer settings, transfer paper, ink, or an inconsistent sublimation coating.
Verify the recommended settings for the specific mug before making adjustments.
Blurry or Ghosted Images
Ghosting often occurs when the transfer moves during pressing or while the paper is being removed.
Secure the transfer tightly with heat-resistant tape and handle the mug carefully when removing it from the press.
Brown or Scorched Areas
Brown or overheated areas may indicate excessive pressing time or temperature.
Check the instructions for your mug blank and adjust accordingly.
Light Areas Near the Edges
Light or incomplete areas can result from uneven pressure, improper transfer placement, wrinkles, or a heating element that does not make even contact with the mug.
Make sure the transfer is wrapped tightly and positioned correctly.
Incorrect Colors
Confirm that you are using the correct printer settings, sublimation ink, transfer paper, and color-management profile.
Remember that sublimation transfers often look dull before they are heat pressed. The colors become brighter after sublimation.
Small Spots or Marks
Dust, lint, fingerprints, or other debris can create marks on the finished mug.
Clean every mug carefully before applying the transfer.
For more troubleshooting help, read Common Sublimation Printing Problems and How to Fix Them.
Best Practices for Better Mug Sublimation Results
For more consistent results:
Test new mug blanks before beginning a large production run
Record successful settings for each product
Use quality sublimation-ready blanks
Store transfer paper and blanks in a clean, dry environment
Check every design carefully before printing
Clean each mug before pressing
Replace worn mug-press heating elements when necessary
Allow finished mugs to cool safely
Inspect products before packaging
Use protective mug packaging when shipping finished products
Small improvements in preparation and consistency can make a significant difference in finished product quality.
Packaging and Shipping Sublimated Mugs
Ceramic mugs can be damaged during storage and shipping if they are not properly protected.
Use appropriately sized mug boxes, protective inserts, and additional outer-box protection when needed.
Browse our Mug Packaging and Gift Boxes for packaging options designed to help protect mugs during storage, presentation, and shipping.
Frequently Asked Questions About Mug Sublimation
Can You Sublimate on Any Mug?
No. For reliable results, the mug should have a sublimation-compatible coating. Standard ceramic mugs generally will not accept sublimation ink properly without the appropriate coating.
What Are Sublimation Mugs Made For?
Sublimation mugs are designed for permanent, full-color personalization using dye-sublimation ink, transfer paper, heat, and pressure.
They are commonly used for photographs, logos, personalized gifts, promotional products, business merchandise, and custom designs.
Do You Have to Mirror an Image for Mug Sublimation?
Yes. Sublimation artwork is normally mirrored before printing because the printed side of the transfer is placed directly against the mug during pressing.
Can You Sublimate a Mug With a Heat Press?
Yes, when using a mug press or compatible heat press attachment designed for the size and shape of the mug.
Can You Sublimate Mugs in a Convection Oven?
Certain sublimation-ready mugs and drinkware can be produced in a dedicated convection oven using the appropriate wrap or shrink sleeve.
Always follow the recommendations for the specific product and use an oven dedicated exclusively to sublimation production.
What Causes Ghosting on Sublimation Mugs?
Ghosting usually occurs when the transfer shifts while the mug is hot. Secure the paper firmly before pressing and remove the transfer carefully.
How Long Do Sublimated Mug Designs Last?
When the correct sublimation-ready mug, ink, transfer paper, and pressing process are used, the design becomes bonded with the coated surface and is intended to provide durable, long-lasting results.
Need Mug Sublimation Supplies?
DyeCraft Direct offers sublimation-ready mugs, tumblers, bottles, specialty drinkware, transfer paper, heat presses, accessories, and protective mug packaging for beginners and professional sublimation businesses.
Explore our Sublimation Mugs and Drinkware or browse our complete selection of Sublimation Blanks.
Whether you are learning how to sublimate a mug for the first time or producing personalized drinkware for customers, choosing compatible blanks and equipment will help you achieve more consistent results.
Need help choosing products for your equipment or project? Contact DyeCraft Direct at 908-842-8082 for product guidance
Shop Sublimation Mug Supplies Online
Ready to start your next mug or drinkware project? Shop DyeCraft Direct online for sublimation-ready blanks, equipment, and supplies.
Sublimation Mugs & Drinkware
White Sublimation Mugs
Sublimation Blanks
Heat Presses
Transfer Papers
Contact DyeCraft Direct
Need help choosing the right products? Call DyeCraft Direct at 908-842-8082.
Related Sublimation Guides
Related Products


Leave a Comment